‘Bees are better off’ is a myth that our folks in North America would jump to disagree with. And that’s not just true for these folks but also for garden owners or bee lovers from the rest of the country.
Well, of course, bee lovers like you exist everywhere.
So, for those of you who are not buzzing the bees away and are planning to welcome them, bee houses or bee hive boxes work like a wonder.
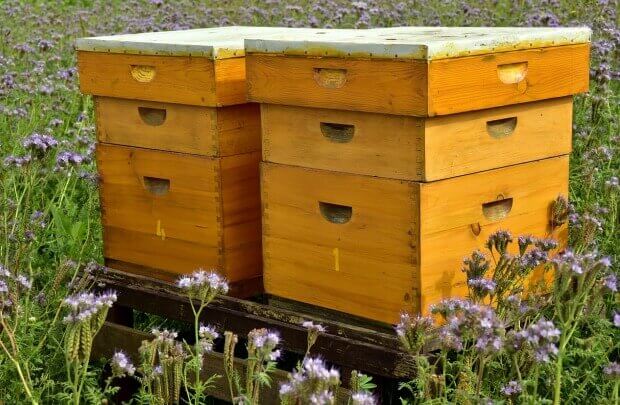
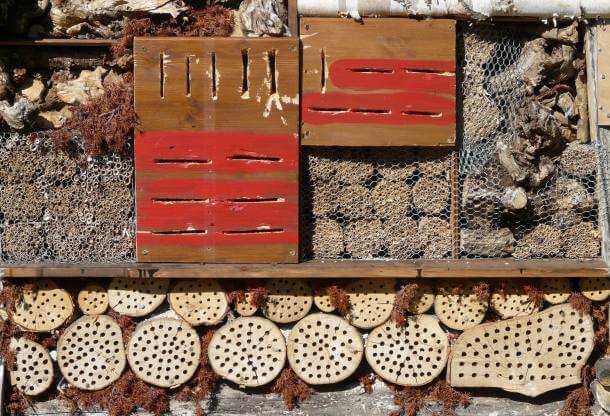
About bee boxes or houses, Mr. Shepherd – Director of the pollinator program at Xerces Society in Portland, Oregon, says, “Bee houses are really simple to make. All you need is a piece of untreated 4 x 6 inch or 6 x 6 inch lumber. Or just use a good-sized dead tree limb or chunk of firewood. Cut the wood into 8-inch-long blocks. Then, using a 5/16-inch bit, drill several rows of holes about 6 inches deep in each block.”
A Wisconsin-based master gardener, Linda Warren, advises beekeepers to:
- hang their bee houses in a location that is considerably far off from their house’s windows. Ideally, it should be a sheltered place.
- hang the bee house at least 3 feet above the ground.
- find a bee house or build one with the holes facing either East or South so that the morning sunlight falls straight upon it.
- not hang the bee house right under a tree. It’s too shady for the bees. They don’t like it!
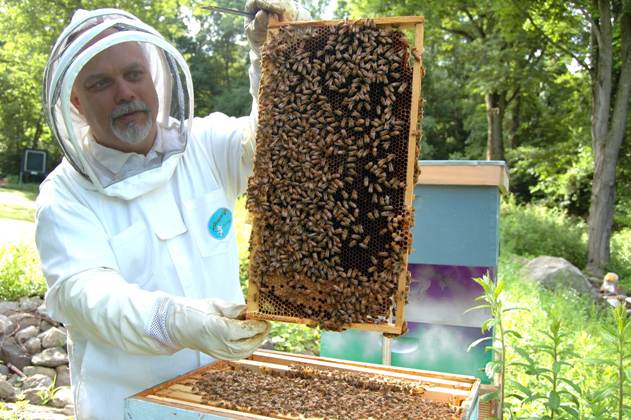
Wondering how to build a bee box?
Here you go!
How to build a bee box for beginners?
Let’s begin by listing out what all you’d need to make a bee box:
- Bottom board and Entrance Reducer
- Slatted Rack
- Hive Boxes and 7D Nails
- Metal Frame Rests
- 10+ Frames and Frame Nails (Go for 11/4” nails for the frame and ⅝” nails for the wedge cleat)
- Plastic or Wax-made Foundation to fit inside the frames (20 pieces would be enough!)
- Wire for Wax Support (if you go for Wax Foundation)
- Inner and Outer Cover
If you visit a beekeeping supply shop, you’d find both assembled and unassembled bee boxes. But if you wish to save some bucks, get the unassembled one and spend a day of leisure assembling it. Remember building those dollhouses for your dolls as a child? It’ll feel just like that!
Now comes the interesting part – assembling a beehive box. Let us warn you, it’s not going to be easy but it’s definitely going to be fun!
Here’s a step-by-step process of building a bee box:
- Collect your tool kit and all the unassembled beehive box kit that you’ve bought, and move to the lawn. Building a beekeeper hive box is not something to be done indoors. Tools should include a hammer, a razor blade, 4 clamps, and a carpenter’s square.
- Spread out all of the 4 pieces of the hive box along with the 7D nails that you need to fix the box in front of you.
- Take a thorough look at the pieces of the hive box, especially the corners. It’s important to identify any sharp corners or an extra piece of wood hanging from the corners of the pieces at this step. You can use your razor blade to trim that off.
- Ideally, the unassembled hive box pieces would come with drilled holes on each pre-cut joint. If yours doesn’t have them, you’ll also need a driller to drill holes on each finger of the joint. That’d help you align the box pieces better when you’d be hammering and putting it all together.
- That’s the next step. Align the box well, bring the pieces together and make sure the handles are falling outside.
- Attach the clamps towards the top on each side of the box. That’ll allow you to keep the box steady while nailing.
- Once your bee box is secured with the clamps, pick your carpenter’s square to check the shape of the box. It should be square! If it’s not a perfect square, make some adjustments to correct the alignment.
- Start nailing the box together using your hammer. You’ll be done when you have a total of 8 nails in the box. And reiterating, the box should be a square. Keep checking up on that while nailing the box as well.
- Once nailing is done, remove the clamps. Now place the clamps towards the bottom. Or place the box upside down and place the clamps towards the top. Adjust the box, check for the square shape, and make readjustments if required.
- Hammer your way around the box with the nails again, like you did before and make sure all four corners are well-nailed. You’ll now have a total of 16 nails in your box.
- Finally, you can start hammering the rest of the nails in the remaining holes to finish the beehive box. A total of 40 nails should be hammered as you work your way around the box.
And, you are done!
Get on to the next box, and then to the next following the same process. If you’re a professional beekeeper, you may need some help doing so. Keep your beekeeper equipment ready! But if you’re only doing this in your backyard for personal beekeeping, 3 boxes like these would be enough.
Now, let’s move on to checking out some cool types of beehive boxes for you to consider.
Types of Bee Boxes for Sale
There are three main types of bee boxes for sale in the market. Let’s dive deeper to know each of them:
1. Langstroth Hive Bee Boxes for Sale
That’s the most common type of bee box for sale in the market. Beekeepers’ favorite, the Langstroth hive-bee box was developed in the 19th century by Rev. Lorenzo Langstroth. This type of bee box includes multiple boxes stacked on top of each other and removable frames for the bees to build their comb in.
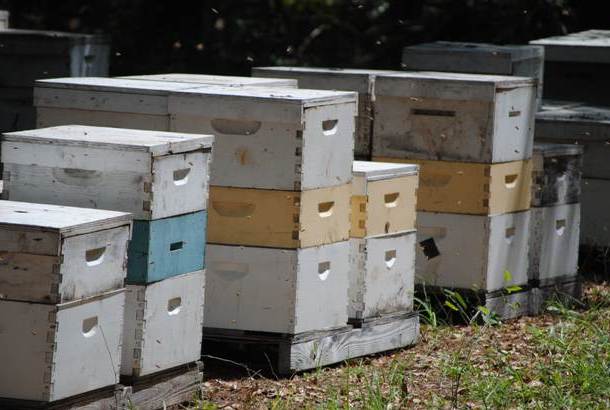
The Langstroth Bee Hive Box comes with different parts having their individual uses:
- The outer telescoping cover is like the roof of the bee house.
- The inner cover is a bridge between the outer roof and the top hive box, designed for insulation. It also prevents the frames from sticking to the top cover.
- The Queen excluder allows the worker bees to go through, excluding the drones and the Queen bees. It’s actually not mandatory beekeeper equipment. You need this if you want to prevent the Queen bees from contaminating the honey with their eggs.
- Shallow Super or Honey Super is mainly used for the production of honey.
- The removable frames, as explained above, are designed to align the beehive boxes. It’s also used by bees to build their honeycombs inside.
- As a beekeeper, you can choose to use a beeswax foundation inside the frames to direct the bees to build straight honeycombs within the frames.
- It’s in the brood chambers that the Queen bee is supposed to lay eggs. The nurse bees are also allowed inside to take care of the eggs and young bees.
- The bottom board is the base of the box.
2. Warré Hive Bee Boxes for Sale
A French monk, Abbé Émile Warré was the creator of the Warré Hive bee box. It’s a top bar beehive box designed in the 20th century. The Warré hive has a vertical top bar, equally-sized stacked boxes with no foundation sheets or frames, and top bars placed in each box to help bees build honeycombs.
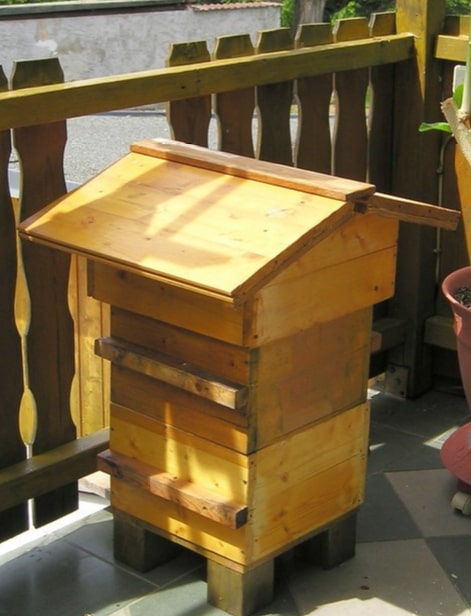
The Warré hive styled bee house replicates the bees’ natural living conditions in the wild, according to many beekeepers. So, unlike the Langstroth beehive box, the empty boxes are placed right at the bottom of the stack. Also, the interior of this bee box looks like a hollow tree, which is often home to the bees in the wild.
At the top of the Warré bee house, you can notice a quilt box which is its roof. It’s made of a particular material that helps absorb the condensation generated by bees inside. It comes quite handy in the winter!
The Warré doesn’t demand much maintenance, which is why though it is still quite unpopular, it’s a preferred choice for beekeepers living in hilly regions or cold areas.
3. Top Bar Hive Bee Boxes for Sale
If you’re into vintage, here’s a bee box for sale that will add more charm to your beekeeping venture. One of the oldest types of hives, the Top Bar is a horizontal hive that comes with wooden bars laid on the top of the long box. As opposed to the wooden frames used in the Langstroth bee house, the top bar bee house features one-piece bars. There’s no foundation required in top bar hives as well. But you need a stand at the bottom to elevate the top bar hive.
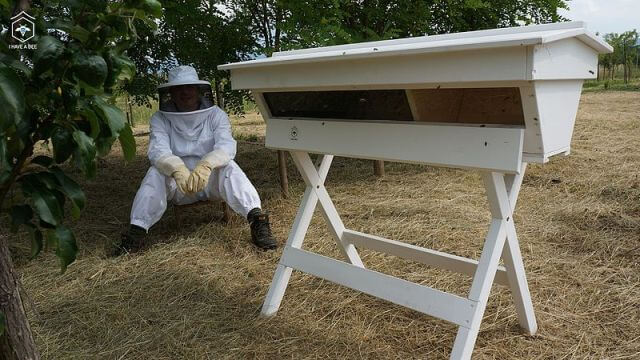
There are some advantages and some disadvantages of choosing a top bar hive against others.
Advantages
- No foundation sheets are required
- No wooden frames are needed; reduces effort and time while assembling
- One of the best advantages is that no heavy lifting is required
- Much easier to manage even at your back, which is not the case with the Langstroth hive
Disadvantages
- You can’t use the centrifugal honey extractor to extract honey from the honeycomb built by the bees.
- Each year, the bees have to make a new honeycomb.
- You have to check up on the top bar hive more often than you would inspect other types of hives. This is because swarming or overcrowding of bees is more frequent in top bar hives.
One piece of advice we’d like to give is that if you are planning to make a home for the bees in your lawn or near your garden for pollination alone, go for the top bar hive bee house. If you’re a beekeeper because you want fresh honey and have a liking for the bees, you can opt for either the Langstroth hive or the Warré hive.
Welcome fresh honey into your household by making bees a part of your life. It’s not tough anymore. Build a bee house or look for bee boxes for sale, and you’re all set to become a beekeeper.
Related Resources: